The Question I Get Asked Most
As a Docker Community Leader in Bangalore, I’ve mentored hundreds of developers getting started with containers. And there’s one question that comes up in every single workshop, every community meetup, every Slack DM:
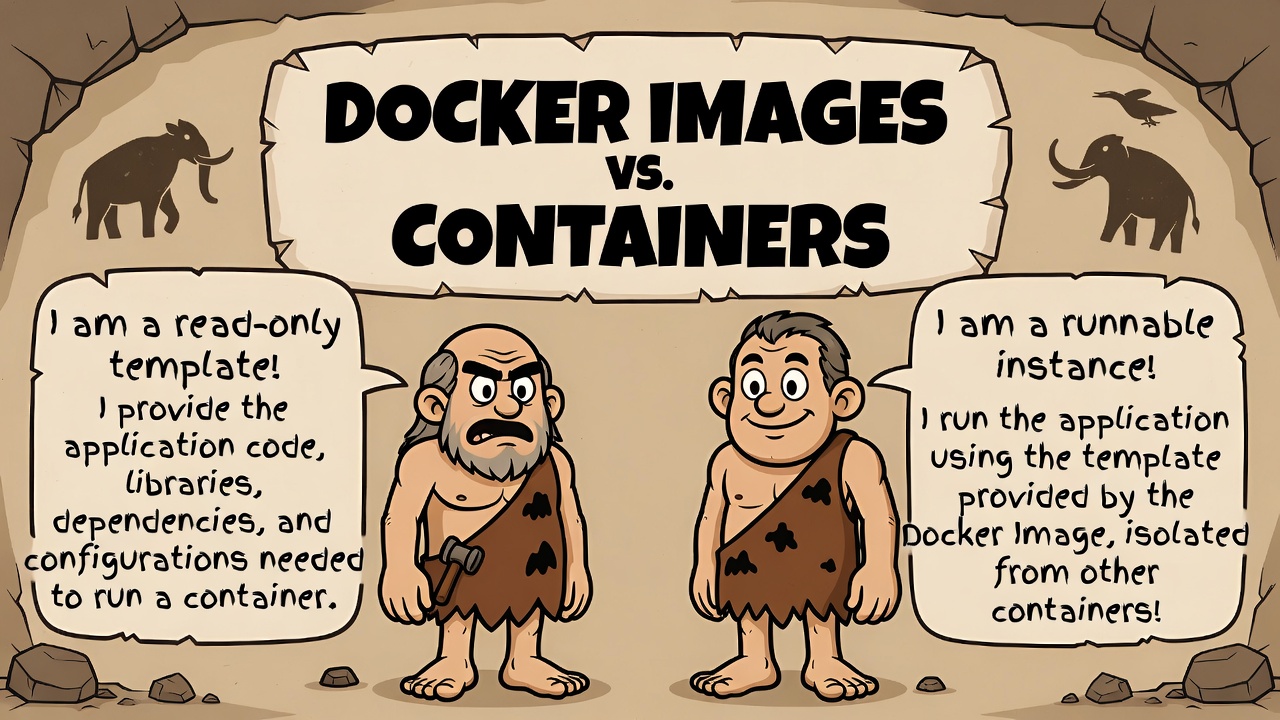
“What’s the actual difference between a Docker image and a container?”
People read the docs. Watch tutorials. Even build working applications. But when I ask them to explain the difference without sounding like they’re reciting a textbook? Crickets.
Here’s the thing: it’s not your fault. The official Docker documentation says “An image is a read-only template with instructions for creating a Docker container.” Technically correct. Completely unhelpful for building a mental model.
Let me show you how I explain this to my community members—with visuals, real code, and the exact “aha!” moments that make it stick.
Why This Is Confusing (And It’s Not Just You)
I see this confusion play out the same way every time:
# Someone pulls an image
docker pull nginx:latest

# They run it... and now it's a container?
docker run -d --name my-web nginx:latest

# The confusion starts
docker images | grep nginx  # nginx shows up here
docker ps | grep nginx      # nginx ALSO shows up here!
“Wait, is nginx an image or a container?”
Both. And that’s exactly the problem.
The Visual Model That Actually Works
After teaching Docker to everyone from bootcamp students to senior architects, here’s the mental model that clicks fastest:
flowchart LR
    A[Dockerfile] -->|docker build| B[Docker Image]
    B -->|docker run| C[Container Instance 1]
    B -->|docker run| D[Container Instance 2]
    B -->|docker run| E[Container Instance 3]

    style A fill:#e1f5ff
    style B fill:#fff3cd
    style C fill:#d4edda
    style D fill:#d4edda
    style E fill:#d4edda
The Core Concept: An image is a frozen snapshot. A container is a running instance of that snapshot. You can create infinite containers from one image—they all start identical but can diverge from there.
Think of it this way:
- Image = Your phone’s factory reset image (ISO file)
- Container = Your actual phone with your apps, data, and customizations
The factory image doesn’t change. But you can reset your phone (or get multiple phones) from that same image, and each one will have its own state.
| Aspect | Docker Image | Docker Container |
|---|---|---|
| Definition | A lightweight, immutable blueprint or template (like a class in programming or a recipe). | A runnable instance created from an image (like an object/instance or a baked cake). |
| State | Read-only, static – cannot be modified once built. | Dynamic, running process – can be started, stopped, or deleted. |
| Purpose | Packages code, dependencies, libraries, and configs to define how an app should run. | Executes the application in an isolated environment. |
| Mutability | Immutable (changes create a new image layer). | Mutable (changes are in a writable layer; lost on delete unless committed to a new image). |
| Lifecycle | Built once (via docker build), shared/reused many times. | Created from image (docker run), multiple containers from one image. |
| Analogy | Snapshot or class definition. | Running program or object instance. |
| Commands | docker build, docker pull, docker push | docker run, docker start/stop, docker ps |
Let’s Build Something Real
Theory is great, but I learn best by doing. Let me walk you through creating an image, then spinning up multiple containers from it exactly how I demonstrate this in workshops.
Step 1: Create Your Image Recipe
Create a file named Dockerfile:
FROM node:18-alpine

WORKDIR /app

COPY package*.json ./

RUN npm install

COPY . .

EXPOSE 3000

CMD ["node", "server.js"]
Step 2: Build the Image
docker build -t my-node-app:1.0 .
What just happened? Docker read your recipe (Dockerfile) and created a frozen, immutable image. It’s stored on your machine but not “running” anything yet. No CPU usage. No memory consumption. Just bytes on disk.
Verify it:
docker images

# OUTPUT:
# REPOSITORY      TAG       IMAGE ID       CREATED          SIZE
# my-node-app     1.0       abc123def456   10 seconds ago   180MB
Step 3: Run Multiple Containers from ONE Image
Now here’s where it gets interesting:
# Container 1 - Development environment
docker run -d --name dev-app -p 3000:3000 my-node-app:1.0

# Container 2 - Testing environment
docker run -d --name test-app -p 3001:3000 my-node-app:1.0

# Container 3 - Staging environment
docker run -d --name staging-app -p 3002:3000 my-node-app:1.0
Three containers. One image. Each can have different:
- Environment variables
- Network configurations
- Volume mounts
- Running states
- Resource limits
docker ps

# You'll see 3 RUNNING containers, all created from the same IMAGE
This is the power of the image-container model. One source of truth, multiple deployments.
The Complete Lifecycle: From Code to Running Application
Here’s the flow I draw on whiteboards at every meetup:
sequenceDiagram
    participant Dev as Developer
    participant DF as Dockerfile
    participant Img as Image
    participant Con as Container

    Dev->>DF: Write instructions
    Dev->>Img: docker build
    Note over Img: Image stored locally<br/>(immutable, versioned)

    Dev->>Con: docker run (1st time)
    Note over Con: Container created<br/>(mutable state begins)

    Dev->>Con: docker run (2nd time)
    Note over Con: New container<br/>(fresh instance, different ID)

    Dev->>Img: docker push
Note over Img: Image shared via registry<br/>(Docker Hub, ECR, etc.)The Key Differences (The Table I Use in Workshops)
| Aspect | Image | Container |
|---|---|---|
| State | Read-only, immutable | Writable, changes allowed |
| Purpose | Template/blueprint | Running application |
| Storage | Stored as layers on disk | Active in memory + disk |
| Lifespan | Permanent until deleted | Temporary (start/stop/remove) |
| Quantity | One source of truth | Many instances from one image |
| CPU/Memory | None (just storage) | Consumes resources when running |
Real-World Example: Redis Configuration
This is my favorite demo because it shows how powerful this separation really is. Let me show you how one Redis image becomes multiple specialized containers:
Pull the image once:
docker pull redis:7-alpine
Configuration file for caching (redis-cache.conf):
maxmemory 256mb
maxmemory-policy allkeys-lru
appendonly no
Configuration for persistence (redis-persist.conf):
maxmemory 512mb
appendonly yes
save 900 1
save 300 10
Now run two completely different Redis instances from the SAME image:
# Cache container - optimized for speed, volatile
docker run -d --name redis-cache \
  -v $(pwd)/redis-cache.conf:/usr/local/etc/redis/redis.conf \
  redis:7-alpine redis-server /usr/local/etc/redis/redis.conf

# Persistence container - optimized for durability
docker run -d --name redis-persist \
  -v $(pwd)/redis-persist.conf:/usr/local/etc/redis/redis.conf \
  -v redis-data:/data \
  redis:7-alpine redis-server /usr/local/etc/redis/redis.conf
Same image. Completely different behaviors. One is a blazing-fast cache that loses data on restart. The other is a persistent database that survives crashes. This is the image-container relationship in action.
The Architecture: How Docker Actually Manages This
Here’s how I visualize Docker’s internal organization:
graph TB
    subgraph "Docker Host"
        DE[Docker Engine]

        subgraph "Image Storage (Immutable)"
            I1[nginx:latest<br/>126MB]
            I2[redis:7-alpine<br/>32MB]
            I3[my-node-app:1.0<br/>180MB]
        end

        subgraph "Running Containers (Mutable)"
            C1[web-server<br/>from nginx<br/>Port 8080]
            C2[cache<br/>from redis<br/>Port 6379]
            C3[app-dev<br/>from my-node-app<br/>Port 3000]
            C4[app-prod<br/>from my-node-app<br/>Port 3001]
        end

        DE --> I1
        DE --> I2
        DE --> I3

        I1 -.creates.-> C1
        I2 -.creates.-> C2
        I3 -.creates.-> C3
        I3 -.creates.-> C4
endThe Commands That Clarify Everything
Here’s the command cheat sheet I share with every community member:
# IMAGE operations (working with templates)
docker images                    # List all images on your system
docker build -t myapp:v1 .      # Create new image from Dockerfile
docker rmi myapp:v1             # Delete an image
docker pull nginx:latest         # Download image from registry
docker tag myapp:v1 myapp:v2    # Create image tag/alias

# CONTAINER operations (working with running instances)
docker ps                        # List running containers
docker ps -a                     # List all containers (running + stopped)
docker run -d myapp:v1          # Create and start container
docker stop my-container        # Stop a running container
docker start my-container       # Start a stopped container
docker rm my-container          # Delete a container
docker exec -it my-container sh # Access container shell
The Golden Rule: An image can exist without containers. A container CANNOT exist without an image. That’s your litmus test when you’re unsure.
Common Mistakes I See (And How to Avoid Them)
Mistake #1: Modifying Containers and Expecting Images to Update
I see this constantly in workshops:
docker run -d --name test-app nginx
docker exec test-app apt-get install -y vim

# The nginx IMAGE doesn't have vim installed
# Only this specific CONTAINER does
# Stop/remove the container, and your changes are gone
The Fix: Make changes in your Dockerfile, then rebuild the image. Version control your images, not your container modifications.
Mistake #2: Trying to Delete Images While Containers Are Using Them
docker rmi nginx:latest

# Error: conflict - unable to remove repository reference
# Image is being used by running container
The Fix: Stop and remove containers first, then delete images:
docker stop $(docker ps -q --filter ancestor=nginx:latest)
docker rm $(docker ps -a -q --filter ancestor=nginx:latest)
docker rmi nginx:latest
Mistake #3: Using docker commit as a Deployment Strategy
Some developers discover docker commit and think they’ve found a shortcut:
# BAD: Making manual changes and committing them
docker exec my-app apt-get install python3
docker commit my-app my-app:modified
The Right Way: Define everything in a Dockerfile:
FROM ubuntu:22.04

RUN apt-get update && \
    apt-get install -y python3 python3-pip && \
    apt-get clean

WORKDIR /app

COPY requirements.txt .
RUN pip3 install -r requirements.txt

COPY . .

CMD ["python3", "app.py"]
Why? Infrastructure as code. Reproducibility. Version control. Everything that makes modern DevOps work.
Hands-On Exercise: See It In Action
Want to really understand this? Try this right now (takes 2 minutes):
# Pull one image
docker pull nginx:alpine

# Create three different web servers from it
docker run -d --name web1 -p 8081:80 nginx:alpine
docker run -d --name web2 -p 8082:80 nginx:alpine
docker run -d --name web3 -p 8083:80 nginx:alpine

# Customize each container differently
docker exec web1 sh -c "echo 'Hello from Server 1' > /usr/share/nginx/html/index.html"
docker exec web2 sh -c "echo 'Hello from Server 2' > /usr/share/nginx/html/index.html"
docker exec web3 sh -c "echo 'Hello from Server 3' > /usr/share/nginx/html/index.html"

# Visit localhost:8081, localhost:8082, and localhost:8083
# Different content. Same image. Different containers.
This exercise shows:
- One image creates multiple containers ✅
- Containers have independent state ✅
- Changes to one container don’t affect others ✅
- Changes to containers don’t affect the image ✅
The Mental Models That Stick
These are the analogies that work best for different audiences:
For Developers:
Images are class definitions. Containers are instantiated objects. Each object has its own state, but they all follow the same blueprint.
For Everyone Else:
Images are recipes. Containers are the meals you cook from them. The recipe stays the same, but each meal can be customized differently.
For System Administrators:
Images are VM templates. Containers are running VMs from those templates. But containers start in milliseconds and share the kernel.
Pick the one that resonates with you and stick with it.
Docker Compose: Where It All Comes Together
Once you understand images vs containers, docker-compose.yml files make perfect sense:
version: '3.8'

services:
  # Each service defines how to create containers from images

  web:
    image: nginx:alpine              # Use existing image
    ports:
      - "8080:80"
    volumes:
      - ./html:/usr/share/nginx/html

  app:
    build:                           # Build image from Dockerfile
      context: ./app
      dockerfile: Dockerfile
    ports:
      - "3000:3000"
    environment:
      - NODE_ENV=production

  db:
    image: postgres:15-alpine        # Use existing image
    volumes:
      - postgres-data:/var/lib/postgresql/data
    environment:
      - POSTGRES_PASSWORD=secret

volumes:
  postgres-data:                     # Named volume for persistence
What’s happening here?
webanddb: Create containers from existing imagesapp: Builds an image first, then creates a container from it- Each service can create multiple container instances (scaling)
- All containers run from their respective images
Run it:
docker-compose up -d

# Docker will:
# 1. Pull/build necessary images
# 2. Create containers from those images
# 3. Start all containers with their configurations
Quick Reference for Your Terminal
Save this as docker-reference.yml:
# Docker Images vs Containers - Quick Reference

images:
  definition: "Immutable template containing application code and dependencies"
  storage: "Stored as layered filesystem on disk"
  state: "Read-only, cannot be modified after creation"
  lifecycle: "Permanent until explicitly deleted"

  common_commands:
    - "docker images              # List all images"
    - "docker build -t name .     # Create image from Dockerfile"
    - "docker pull image:tag      # Download from registry"
    - "docker rmi image:tag       # Delete image"
    - "docker tag old new         # Create alias"

containers:
  definition: "Running instance of an image with its own writable layer"
  storage: "Active process in memory, writes to container layer"
  state: "Writable, can be modified during runtime"
  lifecycle: "Temporary - exists from creation to removal"

  common_commands:
    - "docker ps                  # List running containers"
    - "docker ps -a               # List all containers"
    - "docker run image           # Create and start container"
    - "docker stop container      # Stop running container"
    - "docker rm container        # Delete container"
    - "docker exec -it container sh  # Access container shell"

key_relationship:
  rule: "One image → Many containers"
  analogy: "Class → Objects | Recipe → Meals | Template → Instances"
  critical: "Containers cannot exist without an image"
What’s Next in Your Docker Journey
Now that you’ve got this foundation solid, you’re ready for:
- Multi-stage Dockerfiles – Dramatically reduce image sizes
- Image layers and caching – Speed up your builds by 10x
- Container orchestration – Kubernetes, Docker Swarm, and beyond
- Security best practices – Scanning images, rootless containers
Join the Community
I run regular Docker workshops and meetups in Bangalore, and I’m always learning new ways to explain these concepts better.
Stay connected:
- Follow me on X/Twitter for daily technology tips
- Check out more tutorials and articles on raveendiran.com
- Try the examples in this post and share your “aha!” moments
- Download Docker Desktop and try out the latest features
Your turn: What finally made Docker click for you? Drop a comment or reach out. I’d love hearing different perspectives on these concepts.
One-Minute Summary
IMAGES:
✓ Templates/blueprints
✓ Read-only and immutable
✓ Created from Dockerfiles
✓ Stored on disk, no runtime cost
✓ Versioned and shareable

CONTAINERS:
✓ Running instances
✓ Writable and stateful
✓ Created from images
✓ Consume CPU/memory when running
✓ Temporary and disposable

RELATIONSHIP:
One image → Many containers (like a class → many objects)
Happy containerizing! 🐳